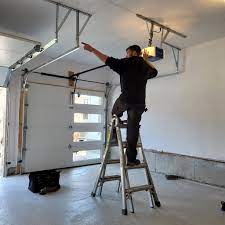
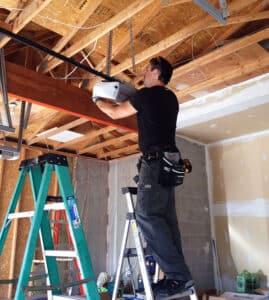
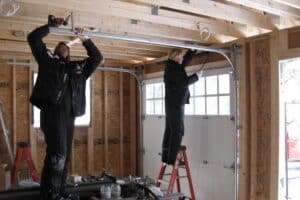
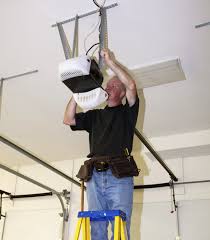
Discover essential tips and tools for a successful garage door opener installation in Roseville, CA. Perfect for any skill level.
There’s a unique satisfaction in completing a DIY project that not only improves your home but also makes everyday life easier. Installing a garage door opener is one such endeavor—combining the perfect mix of functionality, security, and modern convenience. With the right tools and preparation, you can transform your garage from a manual hassle into a seamless, automated space, whether you’re replacing an old unit or installing one for the first time.
This guide covers everything you need for a successful garage door opener installation, from selecting the best model for your needs to tackling the setup step by step. You’ll also learn about essential tools, troubleshooting tips, and how to maintain your system for long-lasting performance. Keep reading to unlock the keys to a smoother, smarter garage experience.
Why Install a Garage Door Opener?
Installing a garage door opener isn’t just about convenience—it’s about enhancing your home’s security, functionality, and overall value. Here’s why it’s a great investment:
1. Improved Home Security
Modern garage door openers feature advanced security measures such as rolling code technology, which changes the access code with every use. This prevents unauthorized access and ensures your home stays secure.
2. Convenience at Your Fingertips
With smart technology integration, many openers now allow remote control and monitoring via smartphone apps. You can open or close your garage door from anywhere, making your life much easier.
3. Enhanced Safety
Garage door openers with safety sensors prevent accidents by automatically stopping the door if an object or person is detected in its path. This is especially important for households with children or pets.
4. Increased Property Value
A well-installed garage door opener is a feature that potential homebuyers value. It adds a layer of modern functionality to your property.
Preparing for Installation
Before diving into the installation process, preparation is key to ensuring a smooth experience. Here’s what you need to do:
1. Choose the Right Garage Door Opener
Garage door openers come in various types, each suited for different needs:
- Belt Drive Openers: Quiet and ideal for attached garages.
- Chain Drive Openers: Durable and suitable for heavy doors.
- Screw Drive Openers: They require less maintenance and are good for extreme climates.
- Wall-Mount Openers: Save overhead space and are great for compact garages.
2. Gather Your Tools
Having the right tools on hand can save you time and frustration. You’ll need:
- Power drill
- Screwdrivers
- Adjustable wrenches
- Measuring tape
- Level
- Ladder
3. Inspect Your Garage Door
A properly balanced and functional garage door is crucial for a successful installation. Test the door’s balance by lifting it manually halfway—it should stay in place. If it doesn’t, consult a professional for garage door repair to fix any issues before proceeding.
Step-By-Step Garage Door Opener Installation
Step 1: Assemble the Garage Door Opener
Unbox your garage door opener and follow the manufacturer’s instructions to assemble the components. This usually involves connecting the rail sections, installing the trolley, and attaching the motor unit.
Step 2: Install the Mounting Bracket
Secure the mounting bracket to the ceiling joists above your garage door. Use a level to ensure the bracket is straight, supporting the opener’s weight and stability.
Step 3: Attach the Rail to the Motor Unit
Connect the assembled rail to the motor unit. Secure it tightly with bolts and ensure it is aligned correctly to prevent future issues.
Step 4: Mount the Opener
Attach the opener to the mounting bracket using the included hardware. Double-check that the opener is level and securely fastened to avoid vibrations during operation.
Step 5: Install the Safety Sensors
Position the safety sensors on either side of the garage door, a few inches above the ground. These sensors prevent the door from closing if there’s an obstruction in its path. Align the sensors carefully, as misalignment can cause malfunctions.
Step 6: Connect the Door Arm
Attach the door arm to the trolley and secure it to the garage door. This arm will transfer the opener’s motion to the door, enabling smooth opening and closing.
Step 7: Program the Opener
To program the opener, follow the manufacturer’s instructions. This typically includes setting the open and close limits, adjusting the force settings, and pairing remote controls.
Step 8: Test the System
Operate the garage door opener a few times to ensure it works smoothly. Check that the door opens and closes completely and that all safety features function correctly.
Enhancing the Installation Experience
1. Use Smart Technology
For a modern experience, consider pairing your opener with smart home systems. Apps like myQ allow you to monitor and control your garage door remotely.
2. Consider Upgrades
Motion-sensing lights and wireless keypads are excellent add-ons that can improve usability and security.
3. Professional Assistance
Hire a professional installer if you encounter challenges or prefer a hands-off approach. Many manufacturers offer certified installation services to ensure your system works perfectly.
Maintenance Tips for Long-Lasting Performance
Once your garage door opener is installed, regular maintenance ensures it runs efficiently and lasts for years.
1. Lubricate Moving Parts
Apply a silicone-based lubricant to the tracks, rollers, and hinges every six months to minimize friction and wear.
2. Inspect the Safety Sensors
Check that the safety sensors remain aligned and clean their lenses regularly to ensure proper functioning.
3. Test the Backup Battery
If your opener has a backup battery, test it periodically to ensure it can power the opener during outages.
4. Tighten Loose Hardware
Vibrations during operation can loosen screws and bolts over time. Inspect and tighten hardware as needed.
5. Reprogram Remotes When Necessary
For added security, reprogram your remotes periodically or whenever a remote is lost.
Avoiding Common Installation Pitfalls
While installing a garage door opener can be straightforward, certain challenges can arise, especially for first-timers. By understanding and avoiding these common pitfalls, you can ensure a smooth and hassle-free installation.
1. Misaligned Mounting Brackets
- What Happens: Improperly aligned mounting brackets can cause the garage door opener to operate unevenly, leading to jerky movements or unnecessary strain on the motor.
- How to Avoid It: Use a level to align the brackets precisely before securing them. Double-check the alignment before attaching the opener.
2. Insufficient Support for the Motor Unit
- What Happens: If the motor unit is not properly supported, it may vibrate excessively or come loose, leading to noise and reduced durability.
- How to Avoid It: Secure the motor unit to the ceiling joists with heavy-duty hardware. If the joists are not in the ideal location, consider installing a crossbeam for added support.
3. Incorrect Sensor Placement
- What Happens: Too high or misaligned safety sensors can fail to detect objects, compromising safety and preventing the door from closing.
- How to Avoid It: Install the sensors 4–6 inches above the ground and ensure they are perfectly aligned. Test the sensors after installation to confirm they’re functioning correctly.
4. Using the Wrong Tools
- What Happens: Using inappropriate or low-quality tools can lead to imprecise installations, stripped screws, or even safety risks.
- How to Avoid It: Invest in quality tools, including a power drill, sturdy ladder, and torque wrenches. Follow the manufacturer’s recommendations for hardware.
5. Ignoring Manufacturer Instructions
- What Happens: Skipping steps or relying on guesswork can lead to improperly programmed settings, malfunctioning components, or voided warranties.
- How to Avoid It: Read the installation manual thoroughly before starting. Follow each step in order, paying attention to programming instructions for open and close limits.
6. Overlooking Wiring Safety
- What Happens: Incorrect wiring can cause electrical issues or pose a fire hazard.
- How to Avoid It: Turn off the power before handling any wiring. Use insulated tools, follow wiring diagrams carefully, and secure all connections with appropriate clips or ties.
7. Neglecting Weight Compatibility
- What Happens: An opener that isn’t rated for the weight of your garage door can lead to premature motor failure or uneven operation.
- How to Avoid It: Check your garage door’s weight and type (single, double, insulated) and match it with an opener that has the appropriate horsepower rating.
8. Skipping the Final Test
- What Happens: Omitting a thorough test can mean unnoticed issues with alignment, force settings, or safety features.
- How to Avoid It: Test the system multiple times, ensuring smooth operation and functional safety features like the auto-reverse. Address any unusual noises or movements immediately.
Common Questions about Garage Door Opener Installation
Can I buy my own garage door opener?
Yes, you can purchase your garage door opener from hardware stores or online. Buying your unit provides flexibility in choosing the right model for your needs, and it’s often less expensive, though installation fees may apply if hiring a professional.
How does a garage door opener work?
A garage door opener works by using a motor to move a drive mechanism (chain, belt, or screw), which raises or lowers the door along tracks. Remotes, wall buttons, and apps control the motor, activating the drive mechanism to open or close the door.
Do you need electricity for a garage door opener?
Yes, garage door openers need electricity to function. However, many models now include battery backups, allowing them to operate even during power outages. Battery-operated openers are especially useful for ensuring constant access in emergencies.
What distance is needed for a garage door opener?
Most garage door openers work within a range of 50-100 feet, though high-end models may offer more extended ranges. Walls, metal structures, and other obstacles may reduce this range, so positioning and model selection for optimal functionality should be considered.
Do garage doors open automatically?
Modern garage doors can open automatically with remotes, smartphone apps, or motion sensors. Automatic openers provide convenience and added security, especially for smart garage doors that allow homeowners to monitor and control them remotely.
Conclusion
Installing a garage door opener is a practical and rewarding upgrade for any homeowner. It adds convenience and security to daily life and enhances the value and functionality of your home.
By following this comprehensive guide, you’ll be well-equipped to handle the installation process of your new garage door from start to finish. With proper maintenance and occasional upgrades, your garage door opener will serve you reliably for years. Whether you install it yourself or hire a professional, the result is a smarter, safer, and more efficient home.
Start your garage door opener journey today and enjoy the benefits of modern technology at your fingertips!
End Note
Installing a garage door opener doesn’t have to be complicated. At Perfect Solutions Garage Door Inc., we simplify the process with professional, hassle-free installations tailored to your needs. Whether you prefer a Liftmaster opener or another top brand, our experts deliver precision and excellence.
Our team specializes in garage door opener repairs, spring replacements, and more to keep your system running smoothly. Check out our garage door brands and services to explore your options.
Browse our gallery or learn about our community initiatives. With us, every installation is backed by dedication and quality. Contact us here to start your journey today.


